Oh Thank You my dear, dear Quilting Buddies!
Your understanding touched my heart!
I hate to be the kind of person that says I'm going to do something,
and then not come through!
So here we go!
I thought the title of the block might just peek your interest!
This story happens to be about a pig.
A pig named Wilbur....
until we found out 'he' was a 'girl'!
And thus....sena was added to his/her name!
But first, I'm going to give you the instructions on how to make this.
It's a pretty easy one!
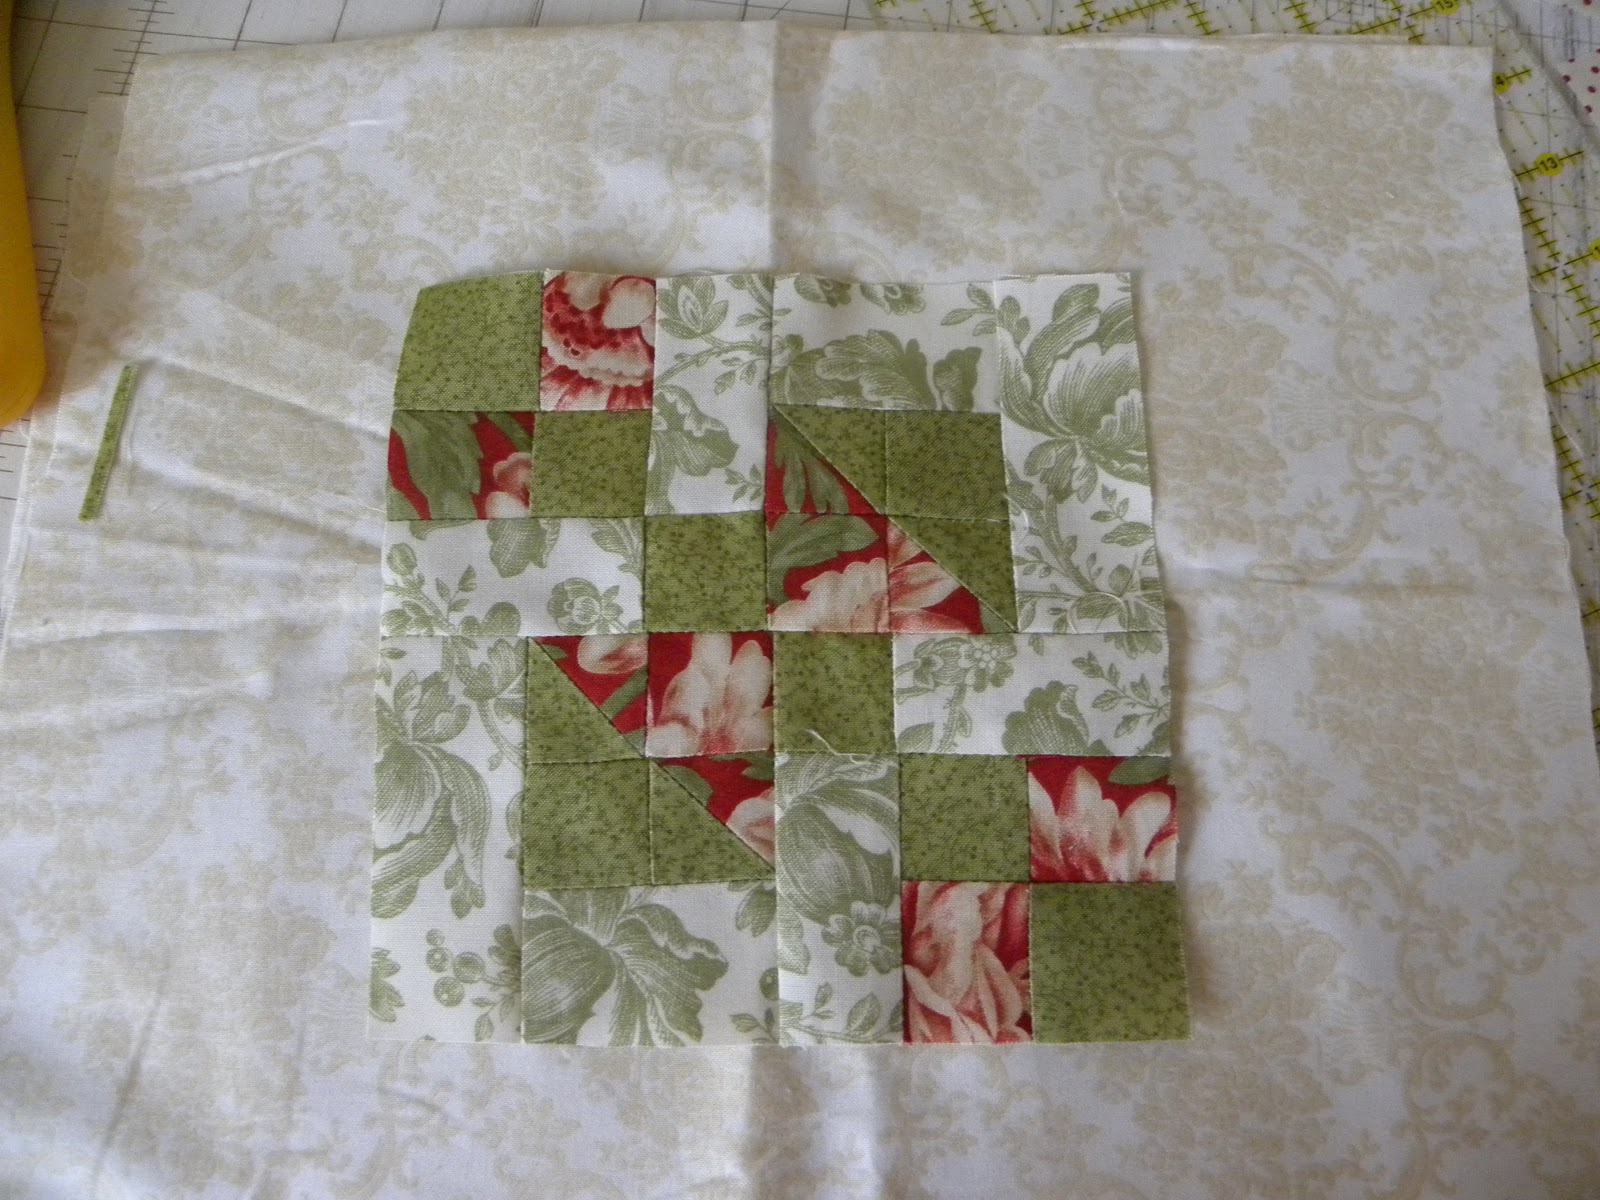
Cutting Instructions
A Cut (12) 1½" X 1½" Squares (Green)
B Cut (10) 1½" X 1½" Squares (Red Print)
C Cut (6) 1½" X 2½" Rectangles (White-Green Print)
Cut (2) 3½" X 1½" Rectangles (White-Green Print)
Sew the (4) A/B HST's together
Layout the block:
Sew the (2) 4 Patches together A/B's
Construct the (2) 4 patches that include the A/B Hst's
Now I completed this block in two sections.
The next picture shows the first section being done,
and from there in the second portion I will show you how I did it.
Sew the 4 Patches to the rectangle beneath it:
And then sew the rectangle to the left of that unit:
Do the same in reverse with the second half:
Stitch these two units together:
And there you have it:
Now for the story!
I was about 11 years old when one Saturday,
my best friend and I headed down to the barn in the early
morning light and heard all of this squealing.
We went straight to where it was coming from.
The pig pen.
There was one little tiny baby runt of a pig
in the pen with it's mama who was trying to kill it.
Apparently she'd eaten the others.
Yeah...I've heard that pigs do that.
So we ran and grabbed a huge shovel that we used for
mucking out the stalls and a rake.
Leaned over the pen and worked and worked to get that
little thing away from it's mother.
Success!
I now was mama to a baby pig.
I raised it in my bathtub.
No one would venture into my room.
Can't imagine why?
On show and tell day in the sixth grade, I talked my mom into bringing it down to school, just for that hour.
She did. Not only that she kept up my 2 hour feedings when I was in school too.
Oh that Rancher's wife.
Little Wilbursena grew and grew.
She was like a dog.
Followed us all around.
Drank root beer from a can.
The day came when dear ole Rancher man said
"It was time!"
"But Dad!!"
He informed the butcher.
The butcher went out to do his deed.
Stood there with his shot gun.
And low and behold couldn't pull the trigger!
He went and told that ole man of mine that hes was going to have
to get someone else to do it!
Ha to you dear ole dad!!
Another time I will tell you the story about my best friend who was there with me that day.
She ended up committing suicide.
But that's for another day.
By the way, baby Kash got his food in time.
Grandma Bear was so exhausted, she borrowed pj's,
stayed the night and came home early this morning,
to get this post done for you all!
Thanks again for your understanding!
Happy Tuesday to everyone!